Having problems exporting MS Word documents with images to PDF?
There are several reasons why this can occur. Let’s look at different settings you can use to fix this and get a better PDF.
Convert to PDF Options in Word
First, there are three ways in Word to convert a document to PDF:
- Click File, Save As, then
- Click File, Save As PDF.
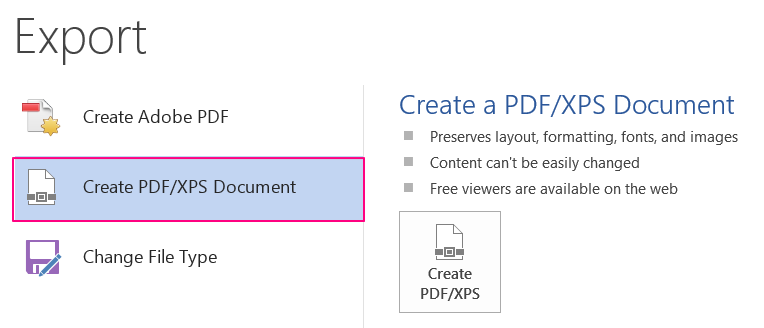
- Click File, Export, Create PDF/XPS document.
Each of these offers different options (and potential problems) when you convert the document to PDF.
Change image format
The most common problem is the image file format you are using in the Word document. Maybe you’re using different formats. Maybe you’ve cut and pasted from Snagit and don’t know what format they are.
If this is the case, you may want to re-create the images using a tool like Snagit (it can batch process the image conversion, rather than doing them one by one.)
The type of image you import into Word may affect the PDF output. In other words, if you try different formats, you may get better results.
One interesting thing about EPS is that it looks very terrible in Word but very clear in the PDF. So, if all you’re interested in is the PDF, try the EPS first. Otherwise:
- Save or convert the image/s into PNG and then insert into Word.
- Save or convert the image/s into EPS and then insert into Word.
- Save or convert the image/s into JPEG and then insert into Word.
- Save the Word document as .docx file and then
- Save As in PDF format.
ISO Complaint Option
Next, try this:
- Open the Word 2013 document with the images inserted.
- Click File, Save As, and PDF from the drop-down menu.
The
Options button is displayed at the bottom of the window.
- Click Options.
- On the Options dialog box, select ISO 19005-1 complaint (PDF/A) in the PDF options section.
- Save the changes.
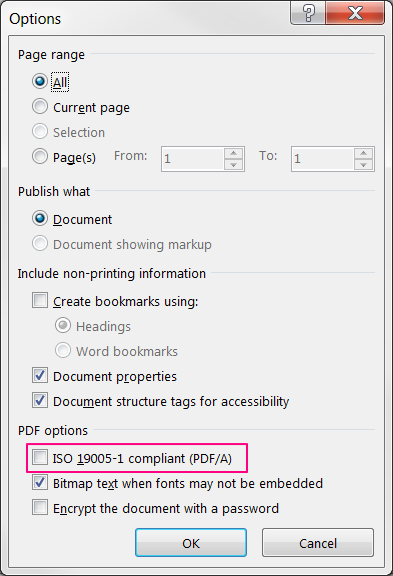
Note: In some instances,
unchecking the ISO19005-1 Compliant option seems to work.
Does this resolve the issue? If not, try the following.
Change Image Compressing Settings
By default, MS Word compress images. This can reduce the image quality when converting to PDF.
Note: Turning off compression can cause very large file sizes without an upper limit on the file size.
You can turn off this compression setting as follows:
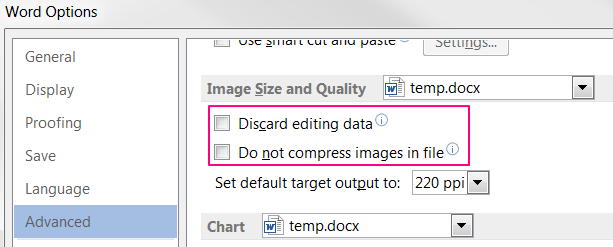
- In Word, click File, Options.
- Click Advanced, scroll down to Image Size and Quality.
- Turn off Discard editing data.
- Select Do not compress images in file.
- Select Set default target output to 220 ppi.
- Save the changes.
Change PDF Optimize Settings
You can also change the PDF optimization settings.
One thing that worked for me recently was to change from Minimum to Standard settings.
- Click File, Save As, then select PDF from the drop-down menu.
Don’t click
File,
Save As Adobe PDF.
- At the bottom of the page, click the Standard button (publishing online and printing) instead of Minimum size (publishing online).
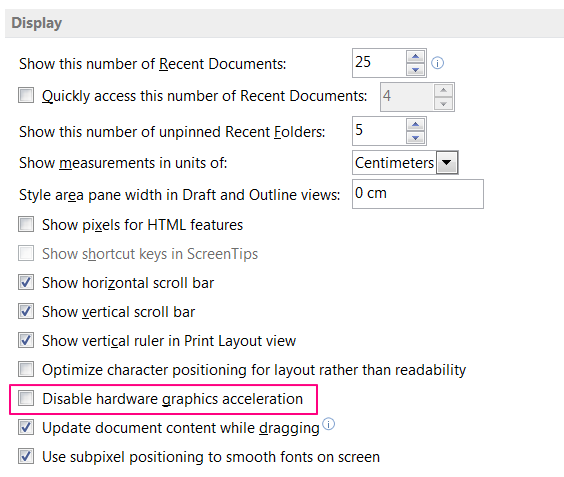
Turn off Hardware Graphics Acceleration
This is a bit of a long shot, but also try to turn off this setting:
- In Word 2013 click on File, Options, Advanced.
- Under Display group of options, uncheck Disable hardware graphics acceleration.